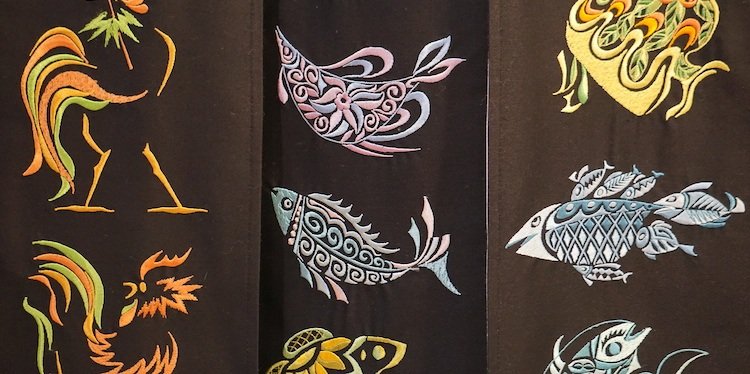

EMBROIDERY IS NOT PRINTING
The main thing to remember is that embroidery is not printing. So it requires an entirely different approach to creating a successful design. Gradients, drop shadows, distressed textures and shading aren’t possible, and you can only use solid colors and shapes in your designs.
Many store owners take one of their designs that worked well on a t-shirt, and they try to transfer it to embroidery. But depending on the design, it can be a big mistake.
DIGITIZATION
Another thing you need to know about machine embroidery is embroidery file digitization. Before the embroidery process can begin, our graphic design team needs to convert your file into a format that our embroidery machines can read. They need to recognize things like stitch type, stitch density, and thread color.
When you submit your design to Berzan Trading as a vector file (preferably in .pdf or .eps formats), our graphics team digitizes it for a one-time fee. Also note that each style of embroidery requires a separate digitized file, as well as switching from a smaller embroidery area, like on a hat, to a bigger one, like on a polo shirt, and vice versa.
So if you submit one design for 3D puff on a hat and later want the same design for flat embroidery on a shirt, you’ll have to digitize that too.
Take note that since the embroidery areas differ between hats and apparel—the embroidery area for a hat is a rectangle, but the embroidery area for a shirt is a square—during adjustment, the graphic will be proportionately scaled to fit the shirt area. In some cases, this might reduce the details to a size at which they no longer work. If this happens, our graphics team will contact you to revise your graphic.
STITCH TYPES
There’s not just one way to embroider—your design might look very different depending on the type of stitch you use! At Printful, we offer two types of stitches, Satin stitch and Tatami fill. These will be the ones used on your designs.
Our machines will also recognize Run stitch as a last resort. This is used if the lettering is too small or the details are too thin to be embroidered in a Satin or Tatami stitch.
Our graphic team decides on the types of stitches that’ll be the best for each design during the embroidery file digitization process. We’ll get into how digitization works later.
Ultimately the type of stitch used will depend on your graphic and how it follows our guidelines. If you have any preferences for stitches, include them in the embroidery notes section—we’ll show you how to find it later in the video.
And with that, let’s have a look at the two types of embroidery we offer and things you’ll want to be aware of when designing for each.
3D PUFF EMBROIDERY
Berzan Trading offers 3 embroidery styles: 3D Puff, Flat embroidery, or a combination of both. 3D puff uses a foam insert under the top stitch to raise the surface, giving it a pop-out 3D look. Note that 3D puff and partial 3D puff are only available for hats.
3D puff, although great for larger design elements, is more limited in its thickness and design complexity.
FLAT EMBROIDERY
Flat embroidery is the style most often associated with embroidery and it can be done both on hats and apparel.
Flat embroidery is great for finer detail. Although, don’t go crazy, still try to keep things as simple as you can for best results.
Lines and strokes can be quite thin, but still, there are limits. The minimum thickness of shapes you can use for flat embroidery is 0.05″, and the maximum is 0.5″. These limitations are for your design elements or lines that will be done with the regular, satin embroidery stitch.
Spacing-wise, flat embroidery isn’t as restrictive as 3D puff. For the best results, we’d recommend adjusting the spacing details to at least .05″ wide, so that the gaps between your design elements would not close up as much.
Flat embroidery is also great for text, but again, you’re limited in size. Text can be no smaller than 0.3″ tall for upper case letters and 0.25″ tall for lower case letters.
Remember that side logos for caps are limited to a maximum of 10 characters for each 2″ wide line.
Also, fonts with serifs, those little points or thin lines at the end of the letters don’t embroider well when they’re small. So try to shy away from them.
And lastly, note that for flat embroidery, small design elements such as stars are measured the same way we measure text so it’s best to keep them at least .25” tall for a smooth result.
STITCH COUNT
Another thing to keep in mind is the pricing depends on the amount of stitches. The bigger the count, the more time-consuming the graphic is going to be for our machines, which drives the cost up.
If your design covers a very large part of the embroidery area or is very detailed and exceeds this maximum stitch count, our graphics team will have to contact you and look into how to best revise your graphic.
STAY MINIMALISTIC
As I mentioned before, simple designs are easy to embroider and have a finished look with nice, tight lines. It’s best to avoid small, detailed designs, as those are difficult to embroider.
A minimalistic design can have a striking impact. For example, a basic design with minimal details can look really good with a red thread against a white cap.
When developing embroidery designs, you should also note that the number of thread colors you use will impact the look of the hat. We offer 15 different colors, but you’re limited to 6 thread colors per design for all embroidery types. If you choose to use multiple colors, make sure the details are large enough so they’ll be sewn the way you want.
